Description:
Save Big on Coursera Plus. 7,000+ courses at $160 off. Limited Time Only!
Grab it
Learn to design and build a custom DIY keyboard in this comprehensive electronics tutorial video that covers the first part of a multi-part series focusing on RP2040 schematic design. Master essential electronic components and their integration, including the RP2040 microcontroller, USB-C connectivity, voltage regulation, crystal oscillators, and LED indicators. Follow detailed step-by-step instructions for component selection and placement, from basic capacitors and resistors to ESD protection and flash memory implementation. Access downloadable project files, including EasyEDA schematics, GitHub resources, and 3D printing files, to create your own functional keyboard while gaining valuable electronics design skills applicable to future projects.
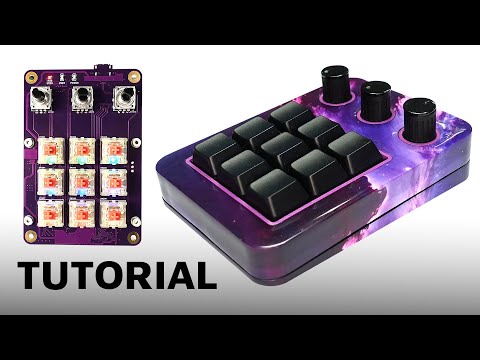
Custom DIY Keyboard Design and Build: Schematic and PCB with RP2040 - Part 1
Add to list
#Engineering
#Electrical Engineering
#Circuits
#PCB Design
#Computer Science
#Computer Hardware
#Flash Memory