Description:
Learn how to create an intricate origami peacock in this detailed 41-minute video tutorial. Follow step-by-step instructions to fold a beautiful peacock with spread feathers and a crest on its head. Master advanced techniques including pleat folds, reverse folds, and sink folds. Suitable for intermediate to advanced origami enthusiasts, this tutorial covers everything from initial folds to final touches like shaping the tail, neck, and head. Use a 20cm x 20cm square of paper, with copper tissue-foil recommended for best results. Discover tips for creating wings, feet, and locking the body structure. Perfect your peacock-folding skills and create an impressive paper sculpture.
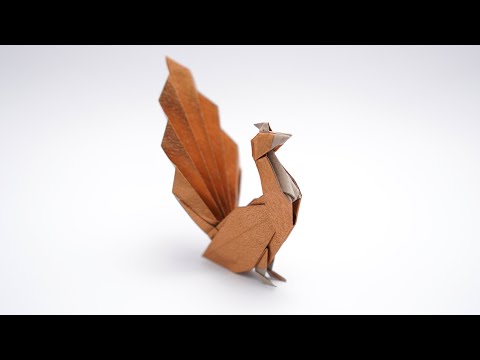
Origami Peacock - Jo Nakashima
Add to list