KNL Dragon from the book Origami Design Secrets Presented here by Jo Nakashima with permission of the creator
2
18cm x 18cm
3
Fold along both diagonals
4
Fold the right edge to the diagonal
5
Make a pinch where it crosses the diagonal
6
Fold the bottom edge to the crease intersection
7
Fold the left edge to the crease intersection
8
Fold the corner to the crease intersection
9
Make all three folds
10
Squash fold the left flap
11
Petal-fold
12
Fold the corner up
13
Fold along angle bisectors too
14
Open-sink the corners using the creases you just made
15
Fold one layer to the left
16
Repeat on the right flap
17
Fold one flap to the top
18
Fold in half vertically and horizontally
19
Fold a Preliminary Fold
20
Fold the tip to the horizontal crease
21
Open-sink the top corner
22
Crimp the two points out to the sides
23
Rabbit-ear this flap
24
Repeat behind
25
Reverse-fold the edge down
26
Mountain-fold the corners to line up with the edges behind
27
Fold and unfold the corners
28
Fold this flap
29
Pull out some paper and fold inside
30
Reverse-folds to shape the tail and the neck
31
Crimp the top layer
32
Outside-reverse-fold the bottom jaw
33
Fold rabbit-ears to make legs
34
Pleat the wings
Description:
Learn to create the intricate KNL Dragon origami design in this detailed tutorial video. Follow step-by-step instructions to fold this complex model, which combines elements from dragons designed by Kunihiko Kasahara and Robert Neale, improved and unified by Robert J. Lang using the grafting technique. Master techniques such as squash folds, petal folds, open sinks, crimps, and reverse folds to shape the dragon's head, body, wings, and legs. Use an 18cm x 18cm origami paper, with the option to start white side up for a colored head and wings. Discover the history behind this design and gain insights into advanced origami techniques as demonstrated by Jo Nakashima, with permission from the original creator.
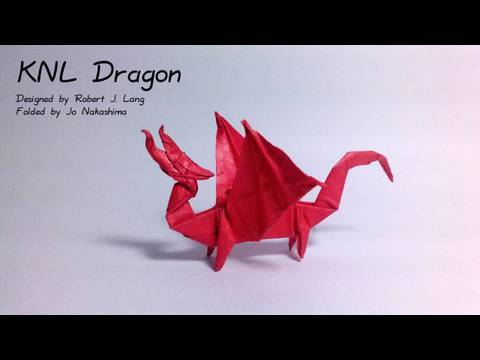