Description:
Learn to design an eye-catching art class flyer in Photoshop with this 44-minute tutorial from Design Cuts. Master techniques for creating watercolor backgrounds, incorporating textures, and applying various fonts and brushes. Follow step-by-step instructions to set up your document, add visual elements, and manipulate text layers. Discover how to use clipping masks, blending modes, and layer effects to enhance your design. Gain practical skills in positioning elements, adjusting colors, and fine-tuning brush settings to create a professional-looking flyer that will effectively promote your art class.
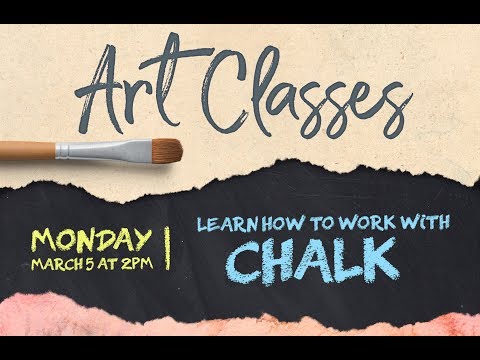
How to Create an Art Class Flyer Design in Photoshop
Add to list
#Art & Design
#Digital Media
#Adobe
#Adobe Photoshop
#Design & Creativity
#Graphic Design
#Typography
#Clipping Masks
#Flyer Design