Description:
Learn the complete process of carving porcelain maker's marks in this comprehensive 16-minute video tutorial. Follow along as the artist demonstrates each step, from preparing the porcelain and carving the design to bisque firing, glazing, and reduction firing. Discover essential tools, techniques, and tips for creating professional-quality stamps. Observe the construction of firing jigs, packing methods for both electric and gas kilns, and the final reveal of the finished, glazed pieces. Gain insights into the entire ceramic process, from raw clay to finished product, and see how these custom stamps are used to sign completed pottery works.
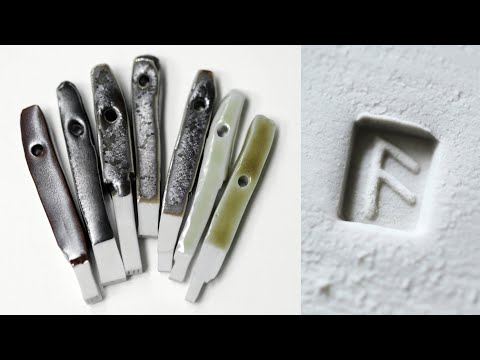
How to Carve Porcelain Maker's Marks - From Start to Finish
Add to list