Description:
Learn advanced 3D design techniques for 3D printing in this 16-minute tutorial video. Explore how to model parts that perfectly fit odd-shaped objects using measurements and reference photos. Discover solutions for undersized holes in small prints and master the art of splitting parts. Follow along as the instructor demonstrates importing and scaling reference images, sketching with constraints and dimensions, and using split tools with planes and sketches. Gain valuable insights into 3D printing design considerations and prototype testing for accuracy. Perfect for those looking to enhance their 3D modeling skills for practical applications in 3D printing.
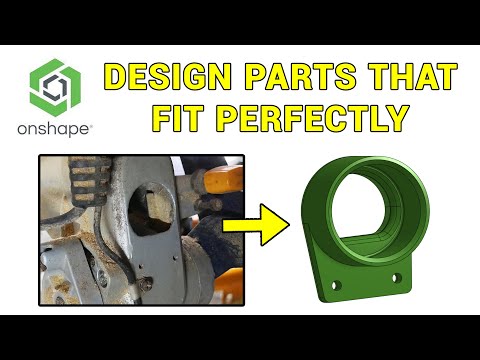
Parts That Fit Odd Shaped Objects - 3D Design for 3D Printing
Add to list
#Art & Design
#Digital Media
#3D Printing
#Design & Creativity
#Prototyping
#Visual Arts
#Drawing
#Sketching
#3D Design
#3d Modeling
#Slicer Software